French with moi
Saturday, April 3, 2010

FranceFranceFrance. The landmark Eiffel, Paris fashion week, Chanel, Crepe, yadayadayada. DREAM destination for most sane global citizens. And no I am not going to France, not in the next five years I think, but to live up to the 'travelogue' name of the blog (as Rachel requested), I will bring you all to France via *drumrolllllssss* ''French nails"~~~~ hehe (ahem pardon my lameness ^^''). Anyway, this will be a very simple way to do French nails at home, because if you go to nail spa or nail salon, it can cost a lot. So why don't we just buy cool nail polishes and use all these times we have at hands (which I sure have in plenty) to glam up our nails? ;)
I know this step-by-step guide to French nails will probably have professional manicurists look down in contempt, but who cares, because it's ma nails, and im happiee ;)
Okay these are what you're gonna need:
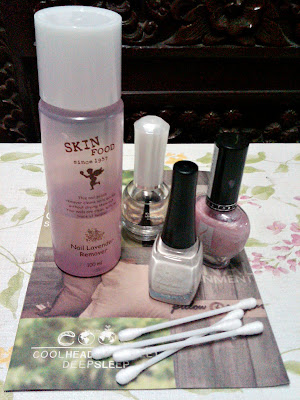
(white nail polish, light pink nail polish with glitters, clear nail polish, nail polish remover and some cotton buds)
And here's the how:
1. Shape your nails. Reasonable length will look nice. Short nails can do French too but I think it looks more glam if your nails are slightly longer.
2.

Apply the white-colour nail polish (this bottle of mine costs 10 Bahts - around 40 cents SGD) on the top white part of your nails. Do it slowly and be patient. You can let it cover more area of the nails than you want for ease of applying - the excess we can remove it later with cotton buds. Try to apply only once but make it thick enough. If you apply twice it'll be harder to dry (which I hate it 'cause I will always do stuffs soon after, and the colour will just go off and annoys me to death).
3.

Dip cotton bud into nail polish remover, then use the wet tip to remove the excess white nail polish and make the shape look nice. Some people use coins to cut sticker and paste it onto the nails to control the shape, but I couldn't bother to cut stickers ^^''. Take as much time as you want in this step, if you accidentally remove more than you want you can always apply the white nail polish again. And remember, it takes practice! So don't be too upset if you can't get it right the first time. It's maybe because I don't have talents but I do practise lots and lots of times. haha.
4.
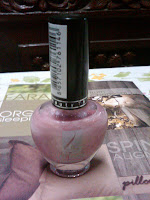
Apply light pink nail polish with glitters on your entire nails. It'll give a healthy glow and add a bit of glam (actually this step is completely unnecessary, you can just skip to step 5, but I always like some glitters on my nails, so yup).
5.
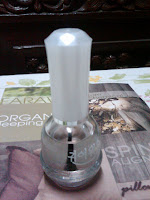
Wait for the previous layer to dry, then apply the clear nail polish as a top coat. Try NOT to use your hands to do anything in the next 30 minutes to make sure it's completely dry. We're done!
And tada, French nails my way ^^
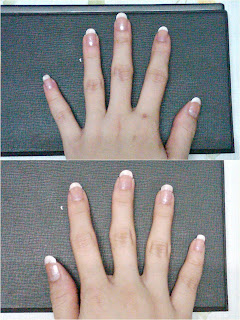
(Ugh my hands are ugly >__<)

On an additional note, all the love and best wishes to all cassies from a shawol ><*
I'm pretty speechless too, but keep the hope up alright???? <3<3<3
ShareLabels: RuaM


3 Comments:
^^ I never really have the patience to grow my nails long enough for this dream look,lol... Will work hard next time... weeeeeeeeee
it takes far less patience than it takes to grow your hair ^^''
I have the bad habit of ... chopping my nails. aishhh I cant help it, my left hand is itchy, it keeps shortening the right one's pretty mails, while hair.... oh hair... I cant bite it off, it's tasteless
Post a Comment
Subscribe to Post Comments [Atom]
<< Home